Registering To Proofread with CAVE
- Apply for a CAVE account by submitting this form. We will respond to your application within 24h.
- After you’ve been approved, open one of the links above and click the Login button at the bottom of the neuroglancer page. You must use the same email address you provided through your application’s Google form.
- Now, you are all set to start proofreading!
Proofreading Overview
Proofreading is done in Neuroglancer, which you need to access through a special link:
Currently, we support proofreading for two datasets:
-
The test dataset is a small subvolume of the H01 dataset and serves as a sandbox to test proofreading. The purpose of this test dataset is for you to get familiar with the proofreading process. You can just play around with it, and don’t worry if your proofreading edits are correct or not. You can access the test dataset through the link in the heading.
-
The full dataset allows users to proofread the whole H01 volume. Only make proofreading edits if you are sure that those are correct. Eventually, changes in this dataset will contribute to improved segmentation.
-
Tutorials on programmatically interacting with CAVE.
-
Proofreading Video Tutorials on YouTube.
Making Proofreading Edits
This is a detailed description of how to make proofreading edits.
-
Setting shortcuts for edit commands
The link above has shortcuts for merge and cut operations already defined.Shift + A → Merge Shift + C → CutIf you want to change those shortcuts, you can bind new keys. In the Graph tab, Click & hold the mouse over the Merge or Multicut field. Next, hit the key you want to bind to the operation. The letter next to the field will update if the new shortcut was set successfully.
-
Merging two segments (Correct Split Errors)
You can merge multiple segments at once. A single bulk merge can merge up to 10 segments.
- Select the segments you want to merge.
- Press
Mon your keyboard. This will bring up the merge menu:
Control + Clicksegment 1 (either in the 2D images or 3D meshes). You will see a red line moving with your cursor.Control + Clicksegment 2. You will see the red line connecting the two segments. If done successfully, both segments will appear in the merge menu.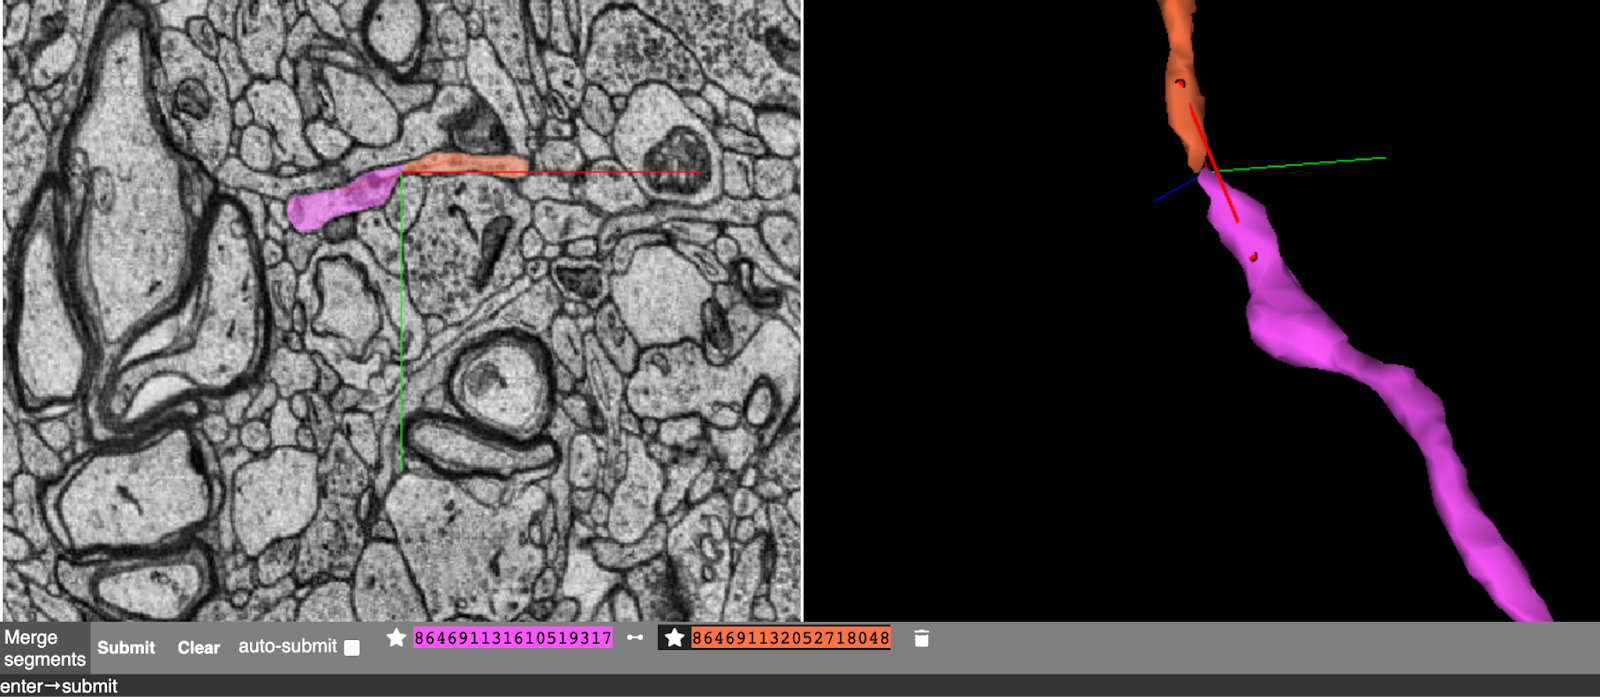
- This process can be repeated up to 10 times before submitting the merge request.
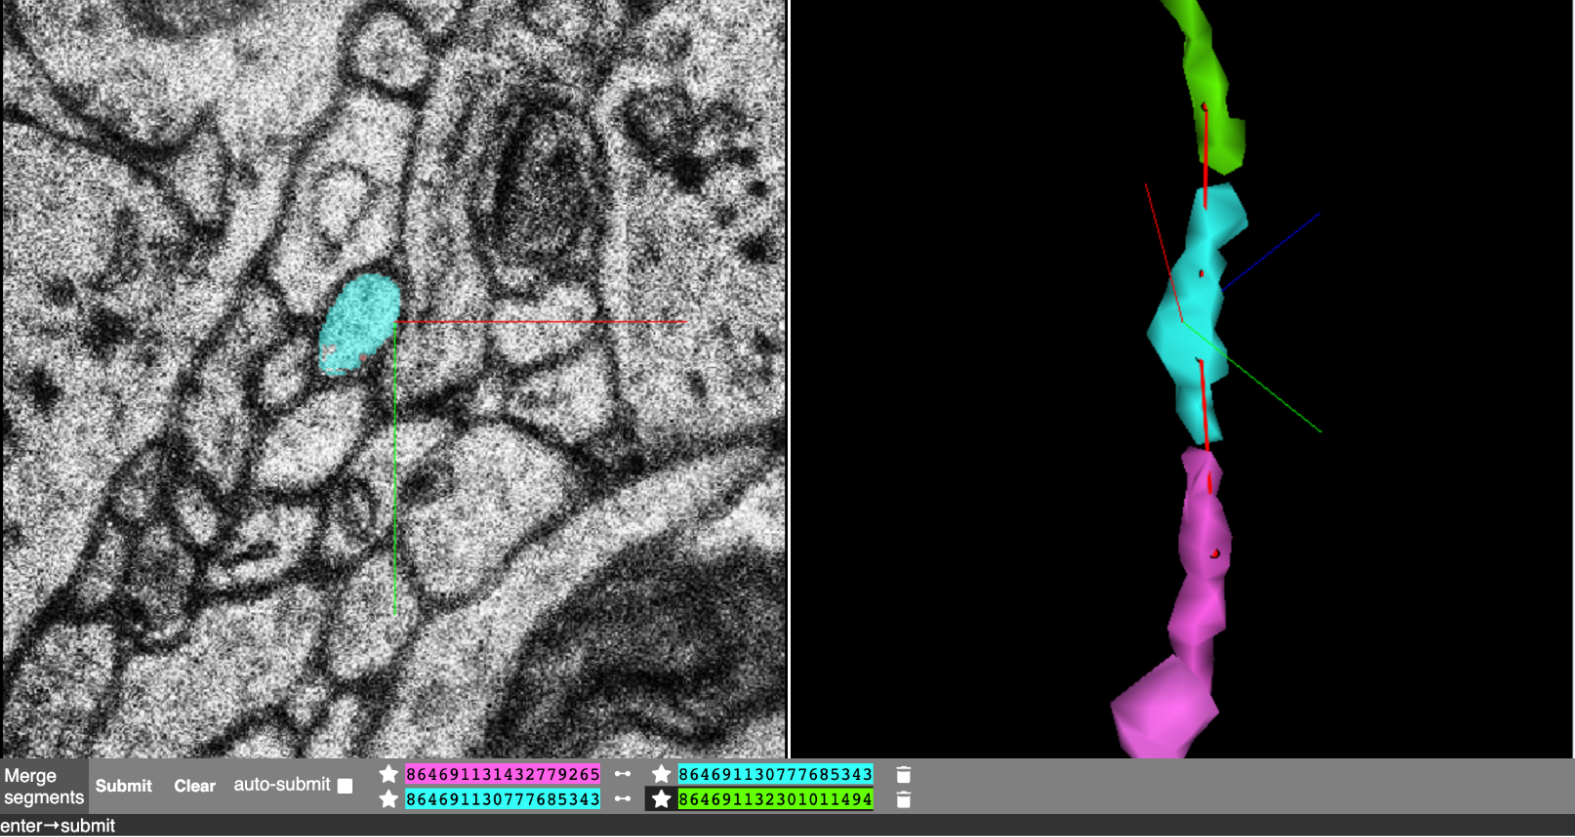
- Click Submit to merge previously selected segments. If successful, the merged segments are rendered in the same color.
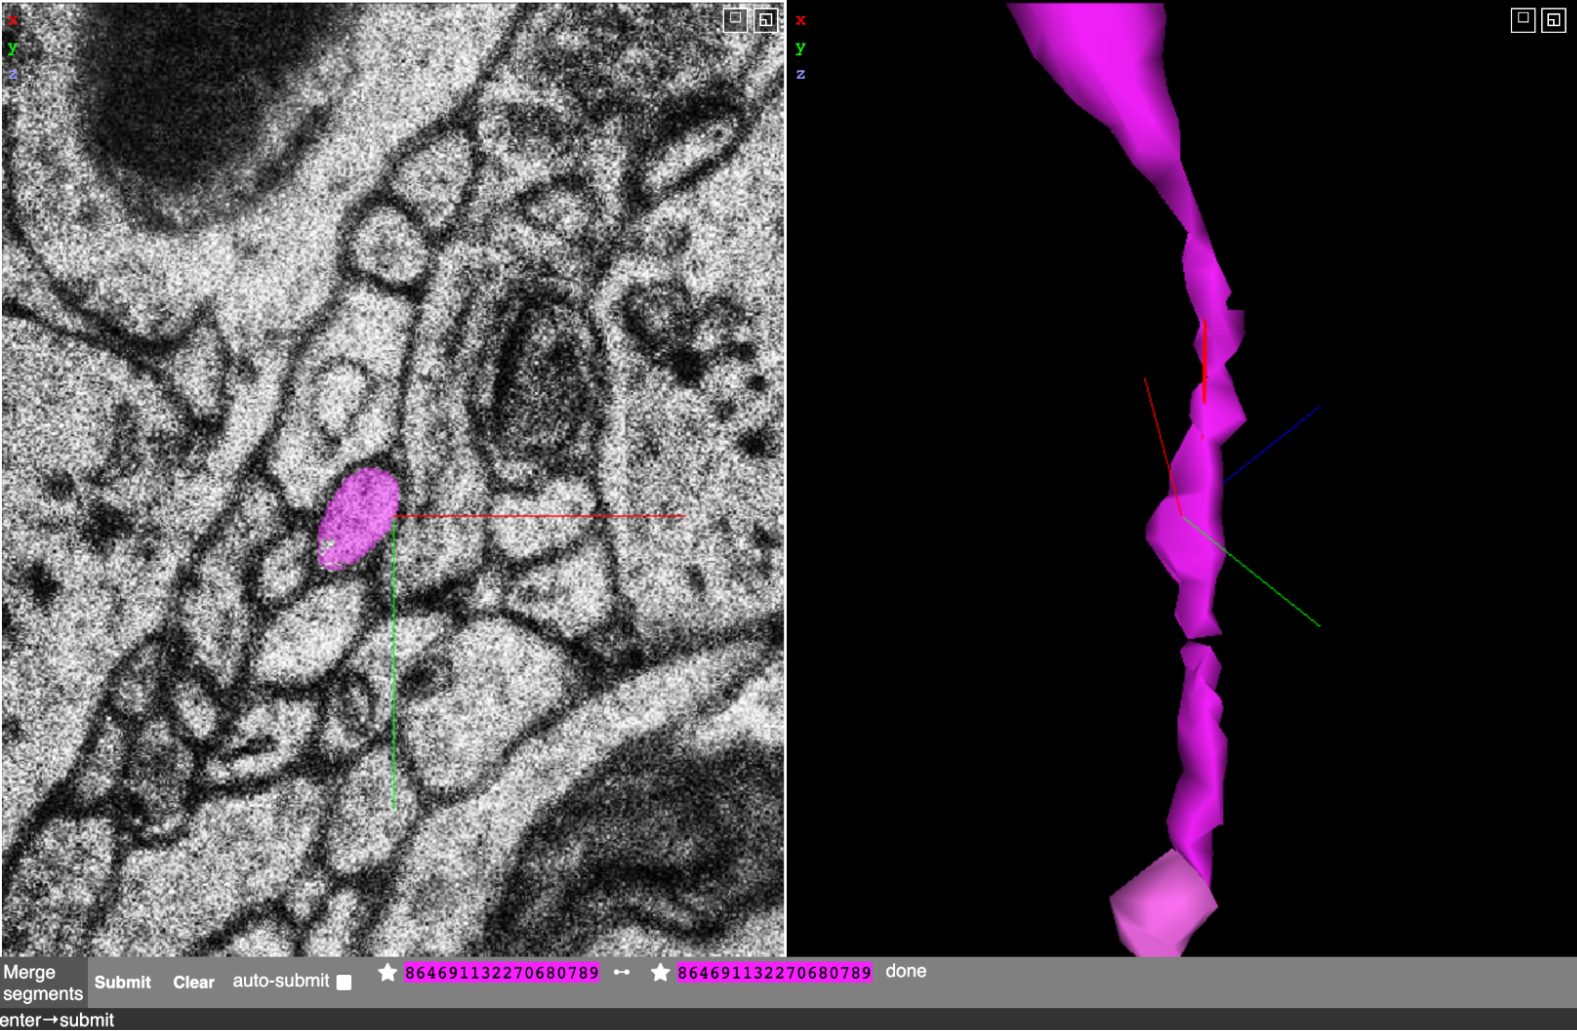
- If you have enabled auto-submit, the request will be sent automatically after selecting each segment pair.
- You can click Clear to cancel all your selections or cancel a selection one by one using the Trash icon.
-
Cut a segment in two (Correcting Merge Errors)
- Go to the Graph Tab in the neuroglancer settings. In the above link, the merge feature is bound to the C key. Make sure you are in the Graph Tab and not (!) in the Seg. Tab.
- Click
Cto open the cutting menu.
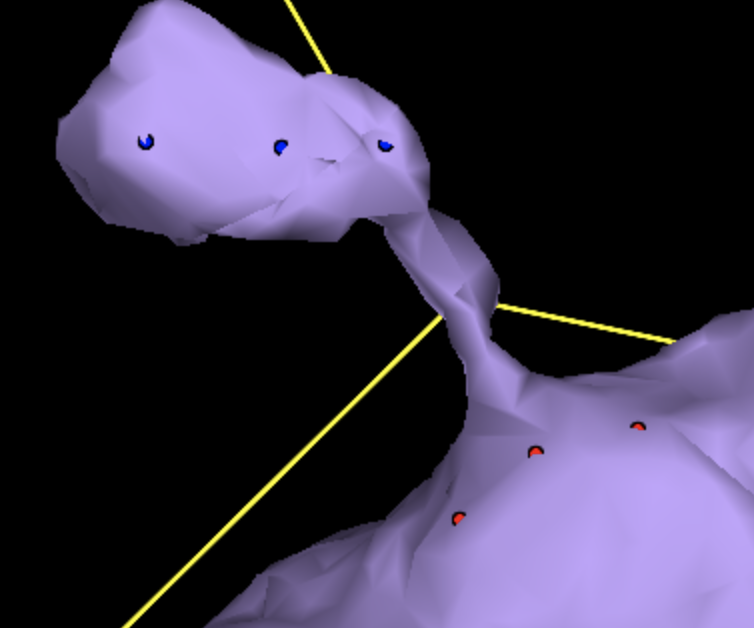
- In the 3D view, place points around the region you want to split on mesh 1. To place points hold
Shift + Controlwhile you click on a mesh. - After you placed points on mesh 1, click Swap before you place points on mesh 2
- After you place points on both sides of the desired cut, it should look similar to this
Note: Usually placing ~3 points per side is enough.
- Click Submit to perform the cut. After a few seconds, you should see both sides of the cut in separate colors. After reloading neuroglancer, the meshes will update.
Current limitations and known issues
Proofreading through the PyChunkedGraph has only been added recently to the main neuroglancer branch (the one used here). This is a different version of neuroglancer than what is used for FlyWire. The Seung Lab is working on moving and improving all features to the main neuroglancer branch; expect changes and improvements. Please report bugs.